Here’s a time lapse video of some neat clouds near my house, accompanied by an excerpt from a piece of music I wrote in June of 2020.
Read MoreNeat Clouds
in Music

Here’s a time lapse video of some neat clouds near my house, accompanied by an excerpt from a piece of music I wrote in June of 2020.
Read MoreThis is going to be a little disjointed. I’m at that moment where things that previously felt disparate are beginning to synthesize together with other things that I’ve recently read or thought about. So, here we go.
Read MoreThis is a bit different from my other book reviews, in that it’s over an instructional book rather than a more traditional one. Regardless, I was fascinated enough by it to write a review, so here we are.
Read MoreI don’t know how to write about this.
One year ago today, my brother-in-law and his wife suffered the heartbreaking loss of their month-old daughter, Austin. I am not them and can’t presume to speak on their behalf, so this is going to be about my experience around that event.
This was something that affected me deeply in many ways, but this blog is about making things and doing stuff, so I’d like to share two specific ways this event shaped my life from a creative perspective.
Read MoreToday I finished rereading one of my favorite books, “Me, Myself, & Bob,” by VeggieTales creator Phil Vischer. I read the book for the first time eight years and eight days ago, on Jan 12, 2011. This was probably about the fourth time I’ve read the book and it was as powerful as ever for me.
Read MoreA brief update regarding the formatting of this website.
Read MoreMy wife gave me an amazing Christmas gift. This is its story.
Read MoreLast year, around March I think, one of the steering cables on my snowblower broke. This is the thrilling tale of said cable’s replacement. Hold onto your coffee, folks, this is a boring one.
Read MoreHello,
I’d like to start using this blog more. It started as a month-long project in December 2014 as a means of accountability for doing things and sharing them with the internet.
If you’re reading this, I’m glad you’re here.
Why?
Because I’d like to start “doing stuff” again and sometimes merely having a place to share what I’m doing is helpful for motivation. If you would like to participate in that motivation, feel free to leave a comment or even share a link when I post something you find interesting. I am under no illusions (and/or delusions) that this will be frequent. At any rate… thanks for being here.
- Peter
I like CD's. I especially like CD's for travelling, and I'm a firm believer that giving yourself a few good choices is often superior to giving yourself all the choices [. . .]
Read MoreTo my friends in slalom skateboarding:
I haven't been to a race in about four years, but I still think of you as extended family. Skateboarding changed my life, and the slalom community in particular gave me a vital sense of connection and purpose during some particularly uncertain years of my life.
Read MoreI recently (yesterday) finished reading Minimalism: live a meaningful life by Joshua Fields-Millburn and Ryan Nicodemus, a pair of dudes with a positive outlook on life and an enviable bromance.
Read MoreI got the rare chance to play guitar, just for fun, for a good 30+ minutes tonight (life with kids is a life of interruption) and somewhere along the line I felt the music grab hold of me in a way I haven't felt in years.
Read MoreThree days ago, my brother Sam and I drove up to Defiance, OH from our hometown of Ottawa, OH to visit "Pack Rat's," a pawn shop where he had seen some decent guitars at a good price (I've been wanting to buy a Telecaster¹ for a little while now). When we arrived there was a sign on the door saying the place was closed from Dec. 24 through Jan. 5 and, not wanting to waste the half-hour drive, we headed downtown to see if we could find any other music stores.
We happened across Don's Music Center on Clinton St. and went inside. It's a small store with guitars on one wall and some other instruments and accessories on the other. The checkout counter is just inside the door with some effects pedals on display, and there's another counter in the back where Don does his repairs. Behind that is a stairway leading up to an area for lessons and another repair bench. The prices are written on small posterboard signs behind each guitar. "I've got some sales running through the end of the year - $50 off this guitar (he points at a Les Paul), $30 off those (he gestures at a row of Squiers). Let me know if you want to try anything out."
Sam and I quietly look over the guitars on offer and Sam suggests I try out one of the thinline Squier Telecasters since I hadn't played one before. They're interesting, a semi-hollowbody version of a traditionally solid-body guitar. At the direction of numerous signs posted behind the guitars, I ask Don if I can try it out. He takes it down from the wall hook and pulls a little amp over for me to plug into. It's a small Fender amp with some different presets to model different types of amp/cab combos, and I'm not a huge fan of it. I soon discovered that it was just as easy to twiddle the gain/volume/tone knobs on it as to try to pick a preset, so I used it that way and had a much better time of it. The guitar itself wasn't bad; it was fun to try out something different. After the thinline Tele I asked to try out an Epiphone Special and Don was happy to oblige. It played pretty well but I noticed the tuners weren't particularly great. Such are the changes that come with a $200 price drop, I suppose.
We were about to head out, but I noticed a banjo hanging on the opposite wall and decided to try it out. It was an Epiphone closed-back 5-string banjo with beautiful wood grain that looked like walnut and had a cool eagle graphic on the back². I asked Don if I could try it out, and he got the banjo down for me. I had never played a banjo before; the closest I'd come was a 6-string "banjitar" tuned like a guitar that I had tried at Guitar Center once. That one didn't really sound like a banjo and just didn't feel right (even though I had never touched a real banjo to know how it was supposed to feel).
This one was different.
This felt like a real banjo, and more importantly sounded like a real banjo³. The instrument gave off a warm, plucky tone - sweet, rich, and mellow when played softly; strong, frenzied, and just a little harsh when played harder. This instrument felt natural even though I'd never played it before, and I found myself thinking, "I could learn this."
For the past few months I had thought that I might like banjo, just because I like the way they sound. Having played one, I knew this was an instrument I needed to learn. I didn't know how it would happen because money is pretty tight these days, but I knew I wanted to get a banjo somehow.
That night, my friend Alex came over to visit, and as it happened he ended up buying a camera flash and cord I had been wanting to sell (conveniently, I had them in Ohio with me). Suddenly, I had over half the money needed to buy that banjo. The next day I was telling my brother Matt about the banjo and how close I was to having the cash for it. In a fit of brotherly love, he PayPal'd me a contribution to the banjo fund, and I was ready to go.
I called Don's Music Center and asked about their hours. He said they'd be open until 5pm on the 30th and 11am-3pm on the 31st, except that his dad was sick and in the hospital and he might need to take a trip instead of opening the store that day. I briefly considered heading straight to Defiance but since I hadn't fully discussed the purchase with Caitlin yet and we'd be heading through there the next day, I decided to wait.
The next day as we came through Defiance, I turned down Clinton St. and found that Don's Music Center was closed. I was disappointed not to be heading home with a banjo, concerned for Don's dad, but glad that he was able to go visit him⁴.
When we got back to South Bend, I started asking around if any of my friends knew of a decent banjo for sale in the area. I checked Craigslist but didn't come up with much. My friend Nat mentioned that he had a banjo but didn't want to sell it, even though he didn't play it much. I asked if he might be willing to let me borrow it until I'm able to buy one, and he agreed to do so.
So that's where I am today. I've got a banjo in my hands and this excites me very much. The timing worked out for this thing to be my de facto new year resolution, and as such I went so far as to declare on Facebook, "2016 will be the year I learn to play the banjo."
Here we go :)
¹ a Squier Telecaster, that is. I'm not made of money, you know.
² turns out it was an Epiphone MB-200, and was mahogany rather than walnut
³ perhaps it helps that it was a real banjo.
⁴ the first time we visited the store, Don mentioned "I won't ever get rich from this store, but I own the building and everything in it, the building's paid for, and family is the most important thing anyway." Don is my kind of guy.
This morning in the shower I realized I ought to (and would like to) write a worship song for Easter. A basic verse and concept for a chorus came to me so I did my best to remember them until I could write them down somehow. For all my trying, though, I still forgot most of it by the time I got to work. However, as I started to sketch out ideas in Finale NotePad, the initial idea came back to me and I developed it into perhaps 2/3 of a song.
When I got home from work today I tried to play and sing the song for the first time, and I found that it was not in a great key for me. I was able to hum the part quietly while working out the melody because it was in the lower portion of my range, but when it came time to sing out, the notes were difficult to project. I could sing an octave up but found that it was at the upper edge of my comfortable, non-falsetto range. Because of this I decided to move up a fourth, from the key of G major to the key of C major. I took the chord chart I had written up and transposed the chords over.
With the song (or part of a song anyway) transcribed into a more comfortable key, I sat down at our piano and played through what I had done so far. It went much more smoothly, and I found a couple of spots where the chords I had written didn't flow as well as I would have liked so I swapped them out for different ones. In addition, I developed a better chord progression for the chorus that incorporated a descending bassline as the musical peak of the song is reached.
With a better idea of how the song needs to progress, I discarded the initial arrangement and have begun composing the song in PreSonus Studio One which allows me to approach it a little differently and offers more tonal variety. As I near completion of a first draft, I'd like to record a demo of it, and preparing the arrangement in Studio One now will save me a lot of time later.
It has been quite a while since I wrote any original music so this has been refreshing and fun. I'm glad I felt the nudge to take up this project and glad I went with it.
As I mentioned earlier, this is a worship song for Easter, so it (hopefully) conveys the hope of the Gospel in the context of Jesus' death and resurrection. The song's working title is "Mercy Flows" but that may change.
As I wrote yesterday, I recently got a MIDI keyboard controller that came with a copy of PreSonus' excellent DAW software, Studio One Artist v2.6. I shared a song that I made while remembering how to use it (having used a demo version in the past) and talked at excessive length about my visit to Sweetwater and the aforementioned keyboard controller purchased there.
The day after making that first experimental track I made another one. Here it is:
I made this track to continue experimenting with Studio One Artist v2.6 which I got bundled with my Nektar Impact iX61 keyboard controller. This time around I experimented with some basic automation and deviated slightly from the default sounds, but everything was still based on the built-in virtual instruments included with Studio One v2.6. I have since upgraded to Studio One Artist v3 and have begun experimenting there a little bit.
This track was again comprised only of virtual instruments that were included with the Studio One software, though I did modify some of the sounds a bit, included some effects, and worked a little bit with automating some of the instrument parameters as the song progressed.
On a recent trip to visit Caitlin's family outside of Fort Wayne, we stopped by Sweetwater to have a look around. I had never been there before (though I've purchased from them online) and I was excited to check out the store. It didn't disappoint, and in fact reminded me of the old Woodwind & Brasswind store¹ in its glory days.
I only made it into the section of the store devoted to keyboards, pianos, synthesizers and the like, but even that provided a wonderful experience where I got to try out a bunch of cool stuff (including a DSI Prophet 12, which was just awesome, and a Yamaha NU1 hybrid piano, which was also super impressive). My real purpose in going to Sweetwater, though,² was to check out a few keyboard controllers and feel them under my fingers before purchasing one to use with my computer.
I finally settled on a Nektar Impact iX61, a fairly basic controller that consists of 61 keys³ along with pitch bend and modulation wheels, one volume slider, and a set of transport controls that double as transpose/octave shift controls. There's a jack for a sustain pedal, a USB port which provides both power and computer connectivity, and a power switch on the back. The key action is squishy like most cheaper keyboards (i.e. not hammer-action or weighted) but has a decent feel to it. I liked the keybed feel on the Roland A-800 pro just a bit better, but that controller is significantly more expensive and does not come with PreSonus' Studio One software.
Perhaps my favorite feature of the iX61 is the software that came bundled with it - PreSonus Studio One Artist v2.6 (and later, a free upgrade to Studio One Artist v3). Studio One is a digital audio workstation (DAW) software, designed for recording, arranging, and producing music. I had played with the professional editions of both v2 and v3 in the past as 30-day trials and was very impressed with both versions. I've played with other DAWs in the past and always found them to be intimidating and difficult to pick up at first but Studio One was much more intuitive, and I knew from that experience that I would want to purchase it someday.
Even though I bought the iX61 back in August I only recently got it out and installed Studio One - I had so many other projects going on that I couldn't let myself dive into this until I wrapped some others up, so it made for some good motivation to get everything else completed! Recently, however, I finally did install Studio One and jumped in to give it a try.
Because it had been a while since I used Studio One I got back into it slowly, and my first project was made without the keyboard controller or any of my external equipment - I programmed the parts on the "piano roll" arranger and used mostly-stock sounds on the included virtual instruments. Here's what I came up with as my first sketch:
I made this track while playing with Studio One Artist v2.6 that came bundled with my Nektar Impact iX61 keyboard controller.
I'd like to develop the idea further and add more to it, but for right now I feel like I'm more engaged and learning faster by cranking out several small projects or sketches because it reinforces the basic concepts while allowing me to go deeper in a variety of styles. And yes that does mean more are on the way :)
¹RIP WWBW :'(
²well, other than just to gawk at everything
³five octaves starting and ending at C, can be shifted in either direction
As you may recall from a previous post, I have a variety of keyboard/synthesizer/music stuff that I enjoy playing with. One glaring deficiency in my setup is my lack of enough table space to easily work with everything, and I've been intending to build some sort of shelf for my keyboard stand for a while now.
Last night I happened to look in my garage and noticed that all the materials I needed were sitting right there waiting for me (leftovers from previous projects). For this simple shelf I cut some plywood and some 2x2's down to size, attached the 2x2's to the bottom of the plywood, and sanded everything a little bit to take the majority of splinters off.
Behold, the result!
I'm going to give this a try for a while to see if it's a good size/plan - assuming it is I'd like to put some kind of veneer over the surface to make it look nicer and add a small lip to the front edge to keep things from sliding off.
This shelf is 35" wide by 18" deep, which comfortably fits my Arturia MiniBrute SE next to the Alesis ControlPAD midi controller:
It also (just barely) fits my Korg MS-20 mini and the MiniBrute side-by-side:
Please forgive the poor quality of the photos; I took these when I popped home over my lunch break so I didn't have time to move the things to better lighting or get out a better camera.
Anyway, I'm really happy with the results, especially given that I was starting with scrap materials. I hope my synths' newfound accessibility encourages me to use them more :)
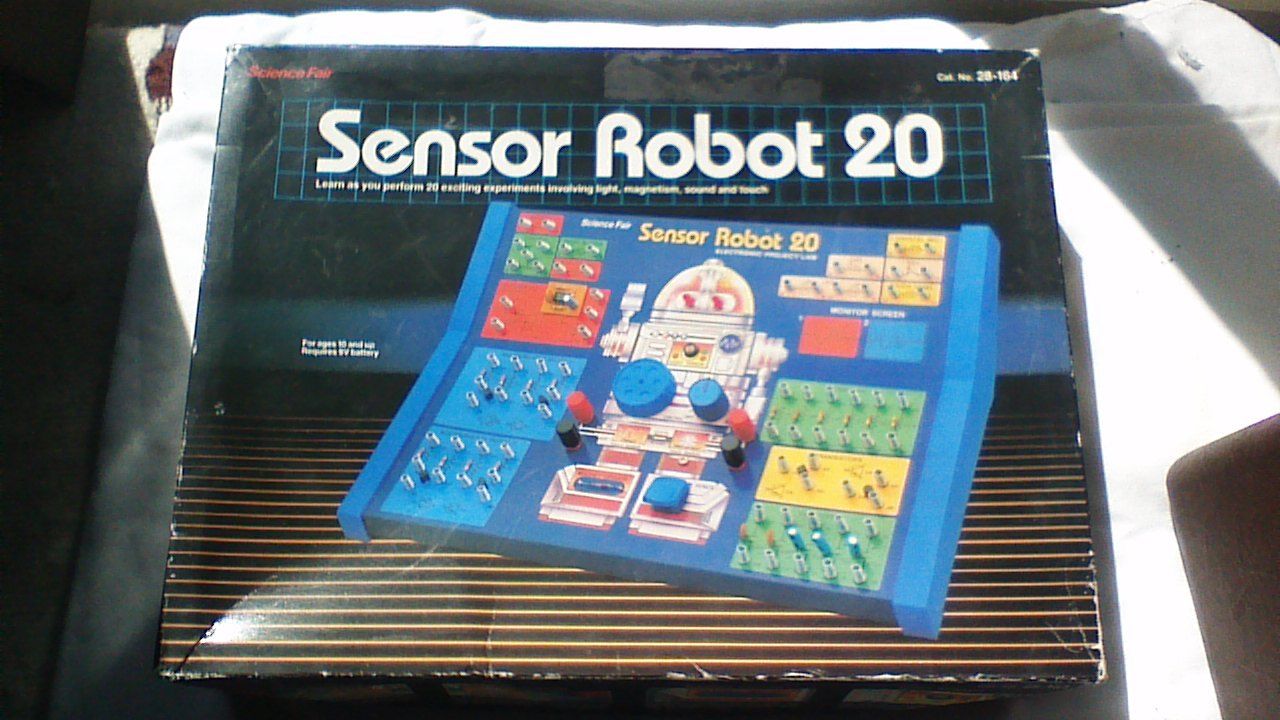
When I was a kid, we had three electronics project kits that always sat on the shelf in my brother Sam's bedroom closet. I'm not sure where they came from (other than Radio Shack, originally) but they were one of those toys that I often got out to fiddle with. We had this one, which I used more when I was younger:
I stole this picture from the internet. Shhh...
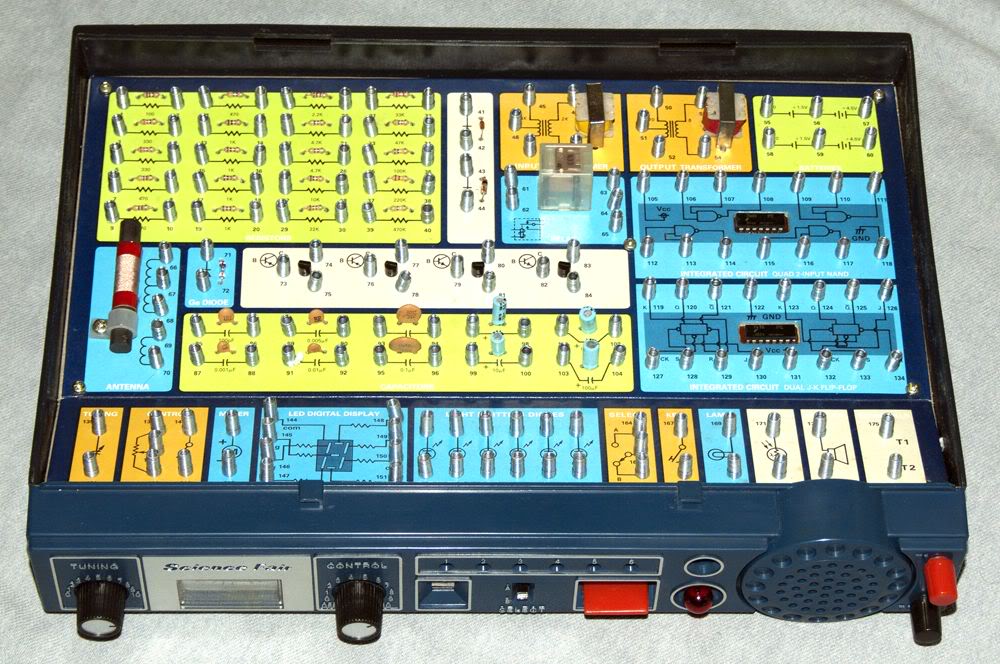
And this one, which I remember using maybe around the time I was 10 or 12?
I stole this picture from the internet too (!)
Then there was this one, which for some reason I never really used. I think there weren't any wires in the box and I couldn't bring myself to use some OTHER kit's wires because what if they got all mixed up. Can't have that.

Guess where I stole this picture from? (hint: it was the internet)
Anyway, if you can't tell from the pictures, these were all kits that let you build circuits by connecting different components together. These components were mounted on the surface of the project kit and the leads were connected to the springs on the box. To connect two components together, you simply bend their respective springs to the side, insert the stripped end of a wire, and release the spring. It's a clever system that actually worked quite well.
These kits came with books showing both the schematic diagram for each project circuit as well as a visual representation that depicted the face of the project kit with lines drawn to connect the components correctly. You could build the project by following the numbers listed in the instructions - for example it would say "2-17" meaning you should connect a wire from terminal 2 to terminal 17, and so on for the rest of the circuit.
I always thought these project kits were pretty neat and I loved following the instructions to build a circuit and then (usually) see it function. I remember the 200-in-1 kit had a "wheel of fortune" project that, as far as I can recall, acted basically like a random number generator with the output going to the 7-segment LED panel - I spent hours carefully following the manual and hooking up wires to complete the circuit. I have no idea if it actually worked or not but I sure do have fond memories of the build process.
Despite all the warm fuzzies conjured up by my reminiscence, I never learned a ton about electronics from these things. I understood how a circuit worked (generally speaking), and I could tell you approximately what each component did, but I never picked up on how to take those pieces and build something of my own. I never understood how the systems actually functioned and as a result couldn't do much to modify the given circuits or come up with an independent design.
I was pretty much okay with that... UNTIL NOW.
Spurred on by a tutorial I found online, I've finally decided it's time to stop being so ignorant about how circuits work. I have a bigger project planned (the one in the aforementioned-but-unnamed tutorial), but for now I'm getting started by learning about Arduino basics. I also picked up a breadboard, some resistors, and a pack of LEDs and made this:

It's about as simple as you can get, but I was proud of having put it together. The circuit consists of a 9V battery, a few resistors to cut down the voltage, and then a green LED. This was partly to practice using a resistor calculator, partly to practice how breadboards work, and partly because the simple goal of getting an LED to illuminate was one that had confounded me as a child (looking back, I probably blew out an LED or two in those kits by shoving too much voltage through them).
Having completed this task, I got the Arduino into the mix and made this stoplight:

The green light comes on for three seconds, then it goes off and the yellow light comes on for one second, then it goes off and the red light is on for three seconds. I decided on the stoplight theme because Elias loves stoplights so much (he definitely thinks Mr. Rogers is cool for having one right in his house). It was easy to put together and the programming for it was also very simple, but it gave me a chance to build something myself without following a tutorial or other instructions. If I can figure out how to replicate the circuit's function inexpensively (e.g. with timer chips or something like that rather than a whole Arduino board) then I'd like to build a little toy stoplight with a switch for Elias and Amelia to play with for their toy cars. We'll see how that goes, I have a lot of projects happening (or wanting to happen) right now.
I hope to post more regularly¹ so hopefully I'll be able to keep you up to date with how these projects are going. I'm excited about them and I hope you are too! I've got the electronics thing, some music stuff, computer things are happening, my office is sort-of-rearranged... good stuff.
----------
¹said every blogger ever


